How to Create a Web API Using ASP.NET Core and Entity Framework in C#
Detailed Steps to create ASP.NET Core Web API with Entity Framework:
In this project, we’ll use:-
- “.Net Core SDK” (Version 3.0)
- Visual Studio Code
- SQL Server Management 2012
- Postman (for test API)
How to Create Web API Project:
Step 1: Firstly, open Visual Studio Code Terminal and Enter this Command to create a new directory in this directory create a new Web API project:
- mkdir StudentAPI (create project name directory)
- cd StudentAPI (change the current directory)
- dotnet new webapi (create webapi project)

After that, Run the Application using this command :
- dotnet run
Check the output of the application in the browser by type the URL :
– https://localhost:5001/weatherforecast

Step 2: Now, install some tools and packages in the project.
Firstly, we will install Tools:
dotnet tool install –global dotnet-ef –version 3.0.0-*dotnet tool install -g dotnet-aspnet-codegenerator
Second, Add NuGet Packages by using the following command :
dotnet add package Microsoft.EntityFrameworkCore.Designdotnet add package Microsoft.EntityFrameworkCore.SqlServer.Design
dotnet add package Microsoft.VisualStudio.Web.CodeGeneration.Design
dotnet add package Microsoft.EntityFrameworkCore.SqlServer
dotnet add package Microsoft.EntityFrameworkCore.Tools
We can show all NuGet packages in the StudentAPI.csproj file

But make sure this all package versions should support the Targeted Framework (netcoreapp3.0 >= package version).
Step 3: Now, we need to create a “Models” folder and add the following file :
· Student.cs
Student. cs will contain all code related to Student Record.

Step 4: Now add ConnectionString in appsettings.json file and connectionString looks like this :
“ConnectionStrings”: { “DefaultConnection”: “Data Source=Server Name; Initial Catalog=Database Name; Integrated Security=True; Connect Timeout=15; Encrypt=False; TrustServerCertificate=False” }

Step 5: Create a new folder called “Data” and in this folder, we need to create StudentContext.cs file.
DbContext is a bridge between your domain or entity classes and the database. DbContext is the primary class that is responsible for interacting with the database. The studentContext file will contain information for the database.

Step 6: Now in Startup. cs file add the following code:
using StudentAPI.Data;
using StudentAPI.Models;
using Microsoft.EntityFrameworkCore;
(these three file add in the header)

and in the “ConfigureServices” method add this dependency injection :

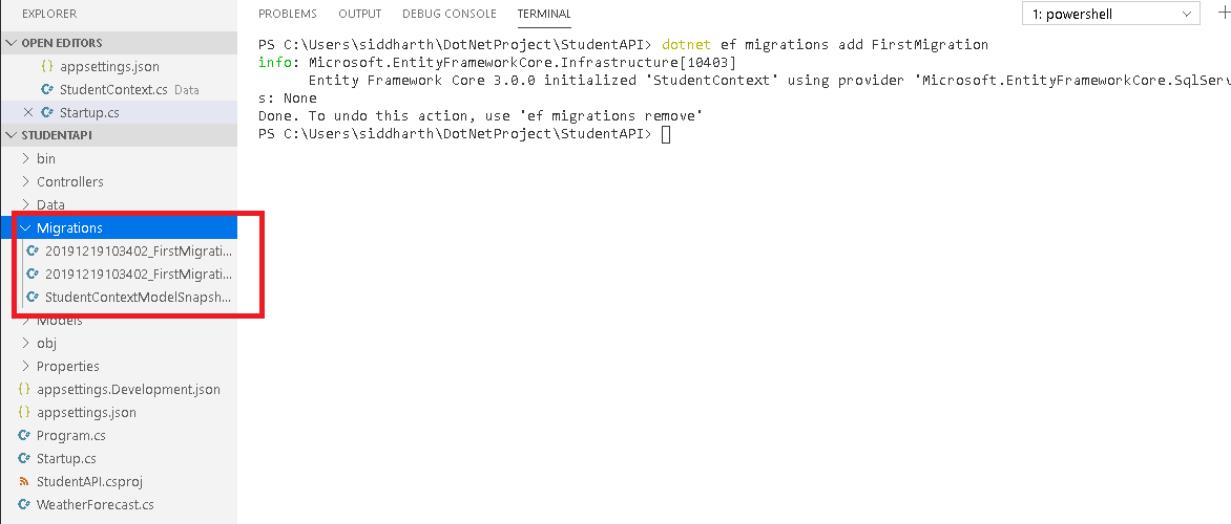
Step 7: Now perform migration and update the database to migrations.
enter the following code in the terminal for migration :
dotnet ef migrations add FirstMigration
FirstMigration is a migration name, we can write any migration name.
After run successfully this command, update the database :
dotnet ef database update
We can see the database has been updated in SQL Server.

Step 8: Now open the visual studio code terminal & enter the following command to create StudentController, which is generated by using the aspnet-code generator.
dotnet aspnet-codegenerator controller -name StudentController -async -api -m Student -dc StudentContext -outDir Controllers
We can see that this code create StudentController in Controllers folder.
this code creates four operations of the Web API application like:
· HttpGet
· HttpPut
· HttpPost
· HttpDelete
(means Display details, Update, Create, and Delete respectively)
Step 9: First, Run our application using dotnet run command,
then open the postman software to check the API call.
In this tool, first, select the return type method to GET and after entering the following URL in the textbox :
· https://localhost:5001/api/student and click to SEND button.

By using this we can get all students to detail in JSON format.
Next, in the HttpPost method, select the POST method and enter the same URL,
enter the Input Json into a body part, and click to send button.
· URL: https://localhost:5001/api/student
· body part : {“name” : “XYZ”, “semester” : “5th”, “department” : “Computer Engineer”}

after that, call the HttpDelete method.
In the Delete method, we need to add ID in URL like,
· https://localhost:5001/api/student/3
in the delete method, there is no requirement to define input in the body part.

When we call the HttpPut method then that time we need to define ID in both URLs as well as a body part.

